When our environment is in chaos it become so much harder to get anything done. That’s why I believe an essential step to better workplace (and home) productivity is to get your space more organized.
After over 12 years in the organizing and productivity industry, however, I’ve often been frustrated by that concept of just “getting more organized.” Why? because most of the systems out to help you “get organized” are missing a major component: the human element.
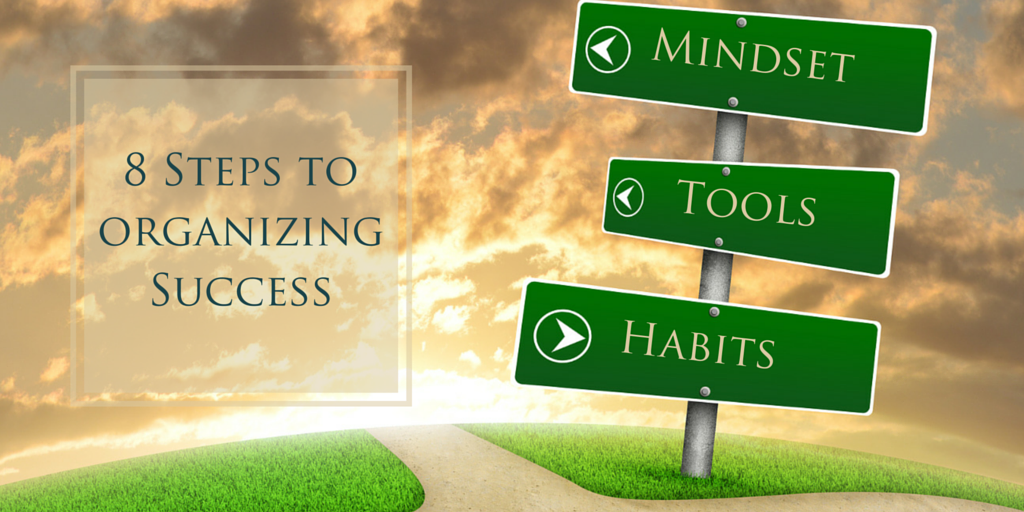
The challenge is that “getting organized” isn’t something that you just do once and then you’re done. It requires the same three things that I constantly teach about productivity: Tools, Habits, & Mindset. Habits don’t just happen over night because you move things around, they are reinforced and developed over time. And mindset issues can perniciously undermine your best organizing intentions and quickly demotivate the most fervent person aiming to “get organized” real quick.
One of the major challenges is that most people focus on the tools… buying pretty containers to make things appear more organized. However, organizing isn’t about attractive bins and boxes, and pretty soon the system dissolves again because the habits and the mindset that originally created the chaos haven’t been addressed.
When I explain it in that way to most people, they get it. They can recognize the gaping hole in what they’ve previously been told about “getting organized,” and can recognize why there are times when you find cases of what professionals in the industry call Chronic Disorganization (CD), which stems from incompletely shifting the habits and mindset of the person and focusing too purely on the physical tools or system.
It was out of recognition of these missing elements that I developed my own system, which I call the 8 Steps to Organizing Success, to which I dedicate a chapter in Inspired Action. The intention of this system is to acknowledge all three elements: Mindset, Tools, & Habits in the process of becoming more organized and living a more organized life.
So, if you’ve got an organizing project that needs some help… Let’s give you an overview of the 8 Steps to Organizing Success here…
1. Create Your Vision
If you don’t know what will be different when you’re done, then it’s hard to know what to do. Or, as George Harrison sang, “If you don’t know where you’re going, any road will take you there.”
This first step of creating a vision of the outcome is so often skipped by people who are eager to jump in and just start moving stuff around and getting rid of things. But, a much more sustainable result comes when you pause long enough to consider:
- What specifically will be true when this space is “finished”?
- How will it look? How will it feel? What will be different about it?
- How committed am I to creating and maintaining that outcome?
- How will my life be different if that outcome is achieved?
- Who can help me create or maintain this new vision? How can I enroll them in the vision for creating this change?
Asking these questions accomplishes two important things. First, it helps you define more specifically where you’re heading, and second it begins laying the mindset groundwork to align you (and others) with the desire and motivation to not only create but maintain that change. Essential!!
2. Sort Everything Into Categories
Now, you’re ready to get dirty and start moving things around. So, the first step is to put the “like” things together, or as a friend and colleague says… “Where are its friends?” When you get started with any organizing project the first active thing to do is simply sort items into similar categories. (Which does not mean keep, donate, trash…. that comes next.)
What I mean is get all the shoes together, all the pants together, all the dresses together… because you will make much better decisions about what to keep and what to let go of if you see that you have 10 pairs of black pants but only wear 3 of them.
Depending on how much stuff and what space you’re working on the categories will be different. In a workspace, the categories might be paperwork, office supplies, personal care, tech-related, etc. Whereas in a garage you might have car-related, yard care, outside toys, tools & home repair, etc.
Generally, start with the largest set of categories and then get more specific if needed. Otherwise, you’ll find yourself sorting highlighters by color when you’re still sitting in a disaster area ;)… we call this micro-organizing.
3. Weed/ Relocate Each Category
Once everything in the space is sorted into categories, now you’ll go back and revisit each of those categories to decide what deserves to stay and what’s ready to go? In other words, you’re weeding each category like a garden creating space for new things to grow. Now is when you might want the trash and donate bins nearby.
Another frequently overlooked group at this stage are the items that you definitely want to keep, but they really don’t belong in this space. Those things need to get relocated to a different area of your home, office, or life. Like that book that’s been living under the seat of your car but really belongs on your kid’s bookshelf in their bedroom.
Best suggestion? Three bins: Donate, Relocate, and Trash (or recycling if you’re dealing with a bunch of paperwork). However, don’t create a keep bin! Why? because then you’ll just be un-sorting those great categories you just sorted, and they will likely still come in handy for the next step.
If appropriate you may also have Repair or Return bins… but make sure you consider if the item is really worth the effort. Some things that were given to you 10 years ago are long since forgotten and don’t need to be returned, and some items that you think would be great if they were just fixed aren’t worth the investment of money or energy.
At the end of this step make sure that everything that doesn’t belong gets removed. Take the items to donate, relocate, repair, or return. Sometimes things get stuck here and the decisions are never completed… a major cause of clutter.
4. Assign Homes
Once you’re down to just the items that deserve to stay in this space of your life, now you get to be creative and consider where they best belong. Things to consider…
- How often do you use these items? Under what circumstances will you want them?
- Who uses them and would need easy access to them?
- How big is this category and would it be better all together or in sub-groups? For instance, you could keep all toys together in a huge toy box, but it might be better in sub-groups: Legos, coloring books/markers, dress-up clothes, etc.
- If I have multiples, then do they belong scattered in various places for ease of use or all together? (i.e. I have a pair of scissors in almost every room of my house so that I don’t have to go far to find them, rather than having one place with 7-8 pairs of scissors.)
The answers to these questions will help you determine whether a particular category belongs in a prime real estate location in your desk drawer or a more remote place like the upper shelf of a closet. It will also help you consider whether you want one box container for the group or several smaller containers.
Figuring out where each category or set of items will live in your space can help you setup a permanent system that is easy to use and interact with.
5. Buy or Locate Appropriate Containers
Often you’ve already collected a bunch of bins and containers in your home that could be repurposed to hold your new categories: boxes, baskets, cups, and other containers can be relocated for a new purpose.
I typically have a small place in my home that is a “shopping zone” for containers that aren’t currently in use. When I reorganize any space, I go shopping there first for good options before running out to the store.
Sometimes you just don’t have the right sized or shaped bin for this purpose, and that’s when it’s time to go to the store. Just make sure you take good measurements of both the collection of items and the space you want the container to live in before you head out. I cover more of the specifics to consider in such purchases in Inspired Action, but the basics are size, aesthetics, visibility (opaque vs. see-through), manageability (can you lift it above your head if needed), & sturdiness.
6. Setup & Label the Final System
This step is when the container and the collections come together and get placed in their final homes. Ideally, you take some time to also label the containers or shelves to help reinforce your new system. Why is labeling important?
- It will help you remember your decisions.
- It will reinforce new habits.
- It communicates the system to other people who share the space and enables them to maintain it.
Even if the labels are just temporary post-its for a few weeks, it can really help.
In most organizing systems… this is where things would stop. After all, the system is setup and everything is put away, right? Not so much… because as I said at the beginning, now the human element to maintain the system comes into play. Therefore… on to…
7. Identify & Develop Habits
Now that your system has come together, pause again and consider what habits you’ll need to integrate to be able to maintain it.
- Processing new paperwork and mail daily?
- Picking up the room and putting things back in their new homes?
- Remembering to always put your keys in their new designated spot?
These are just a few examples of the types of habits you might want to intentionally plan into your life rhythm to maintain your new system. Visualization can be a great aid to this step. What would be your cue that it’s time to do your new habit? Close your eyes and watch yourself, feel yourself, moving easily through this new habit from beginning to end? Notice how easy it is and how great you feel maintaining your work.
You can also use habit tracking solutions to help you create some accountability and measure your success in performing your new habit. (There’s a whole chapter on building habits in Inspired Action too.)
8. Evaluate and Update
This final step is to pay attention and tweak (or overhaul) as needed. The reality is that our lives and needs shift constantly, so a system that was a perfect fit for you six months or two years ago might be completely wrong now.
It’s best to acknowledge that organizing is an organic process of shaping our world to fit our current lives, and as those lives change so should the spaces that hold them. All that stuff for the hobby you loved 10 years ago but haven’t touched in the past 5 years might be ready to move on to someone else. Everything that flows into our lives will eventually flow out of it again whether we’re making the decision ourselves or leaving it to our heirs.
So, what an amazing gift we can give, not only to ourselves, but to those we love to develop our organizing skills and make sure our lives are a “right fit” for us right now. This is also a mindset shift for many people.
It’s a choice to not hold on to everything that enters our world “just in case” it might someday be useful again. Rather, we can choose what stays with us intentionally and selectively, and we give our energy and space to the things that truly enrich our lives rather than just collect dust.
If you’ve outgrown a particular system, then just start back with step 1 above to bring you to a new system and expression of your life.
Next Actions
Is there a space in your home or office that’s due for some re-organization? If so, then don’t try to tackle it in a day, walk through this process in small chunks to avoid burnout. Grab your calendar and schedule, preferably, 90 minutes (3 hours is even better) to get started walking through the 8 Steps.
Once that time is up, you likely won’t be done. That’s alright! In fact, that’s great because you’ve at least gotten started. Just grab your calendar again and book another block of time to pick up where you left off.
If you just keep actively making progress in this way you’ll begin to get comfortable with organizing becoming a natural part of your life rather than a weekend long blitzkrieg that then quickly dissolves. Trust me… it’s much more effective and will get you longer lasting results… even if it might take a bit more time to create your desired outcome.
Original Image used under license agreement: ©Cherezov / Stockfresh